
A collaborative writing workshop
In a collaborative writing workshop, the whole class writes one single story, together. You prepare its outline, the master story, and you set aside fragments in it: the passages your students will write, in small groups. You review their parts, you assemble them, and you share the final story with the class.
This guide follows the workshop in the order you will live it, from preparation to the shared reading.
The run, at a glance
Section titled “The run, at a glance”| Step | Who | What happens |
|---|---|---|
| 1. Prepare | You | You create the workshop and its master story, with one fragment per group. |
| 2. Launch | You | You launch the session for a class and share the students out over the fragments. |
| 3. Write | The students | Each group writes its part, then hands it in with “I’m done”. |
| 4. Review | You | You read the parts handed in. You add them to the story, or you ask a group to rework theirs. |
| 5. Share | You | You open the assembled story to the class, which reads it in full. |
Nothing forces you to do it all in one go. Steps 2 to 4 can repeat: you can launch with a few groups, add their parts, then place more students.
1. Prepare the workshop
Section titled “1. Prepare the workshop”From Workshops, create a workshop and choose the Collaborative writing type. Give it a name: the workshop is created, still Incomplete. The description, the objectives and the instructions are set as for any workshop. See Create and fill in a workshop.
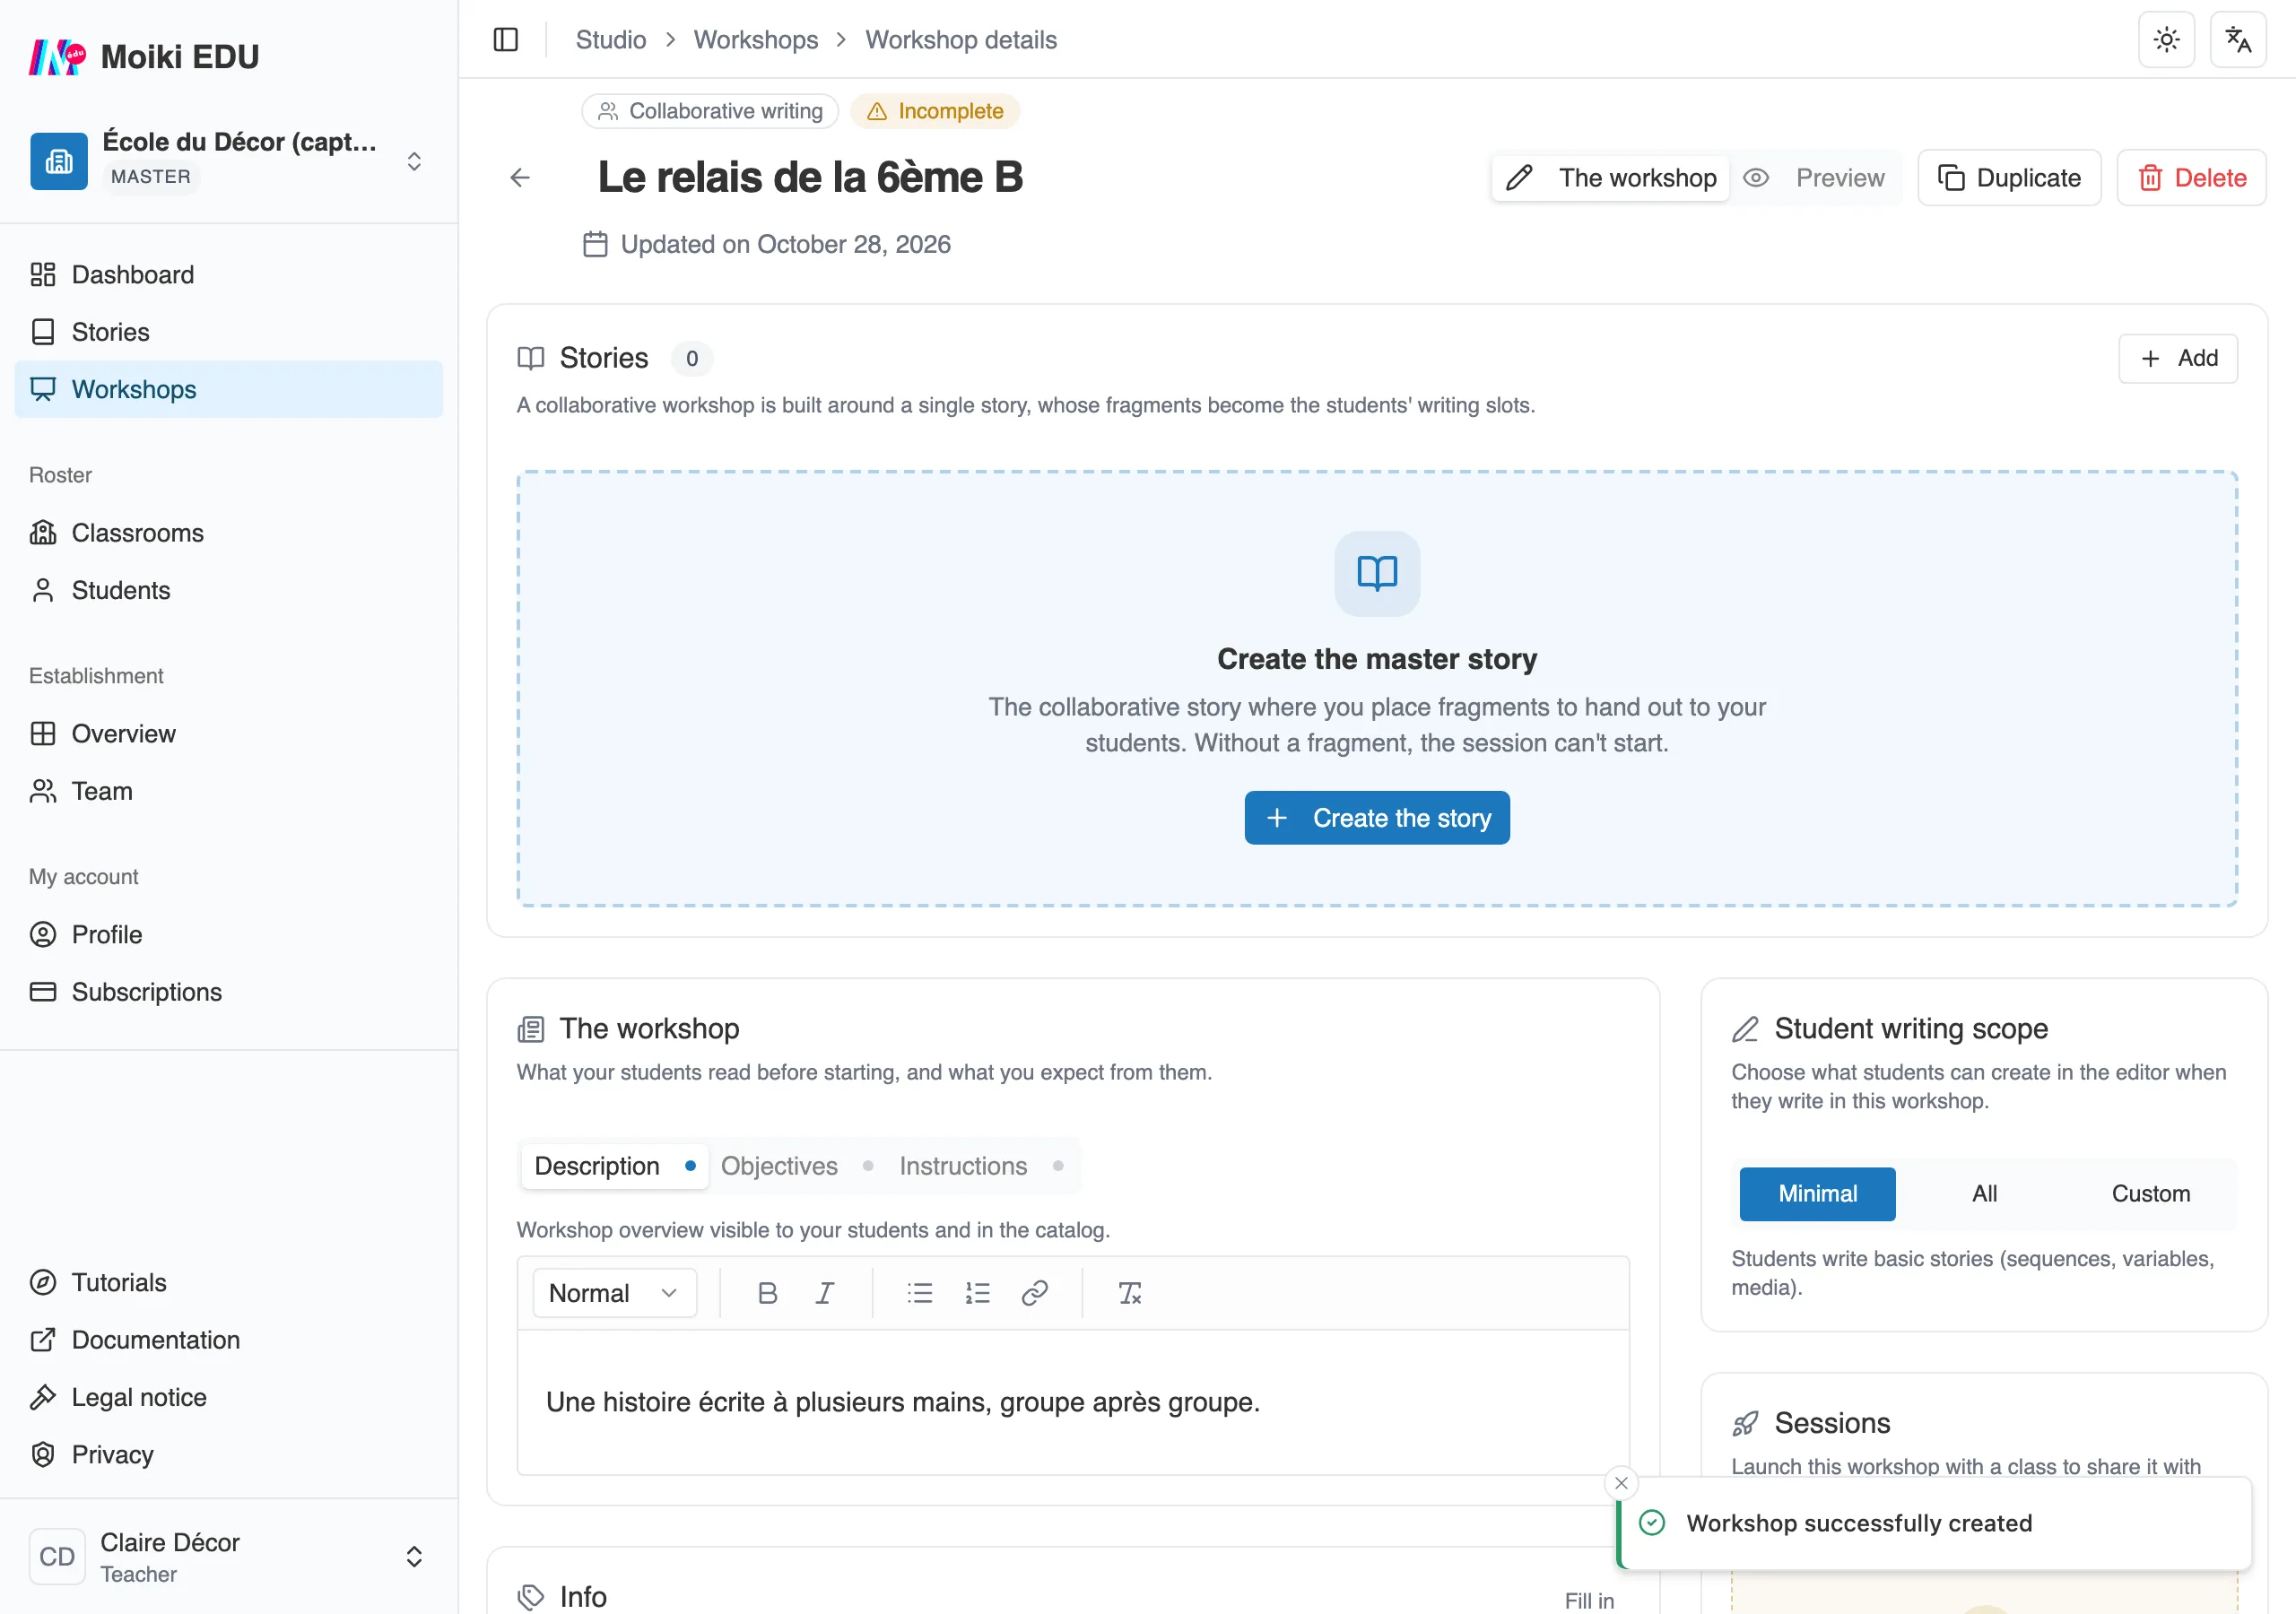
A collaborative workshop that has just been created. Without a fragment, the session cannot start.
It now needs its master story. A collaborative workshop holds only one, and that is the one the class will complete. The simplest way is to start from one of the three templates made for this, saying how many fragments you want. Count one fragment per group, of one to four students each.
This preparation has its own page: Prepare the master story. It explains the templates, a fragment’s instruction and exits, and what to check before launching.
Once the master story is in place, the workshop switches to Ready to launch.
2. Launch the session
Section titled “2. Launch the session”On the workshop page, Launch a session asks you for a class and, if you want them, dates. The session is created as a Draft, and opens on the assignment board.
Share out the students
Section titled “Share out the students”The board puts the class list and the graph of your master story side by side. Click a fragment, the green diamond, to see its group at the bottom of the screen.
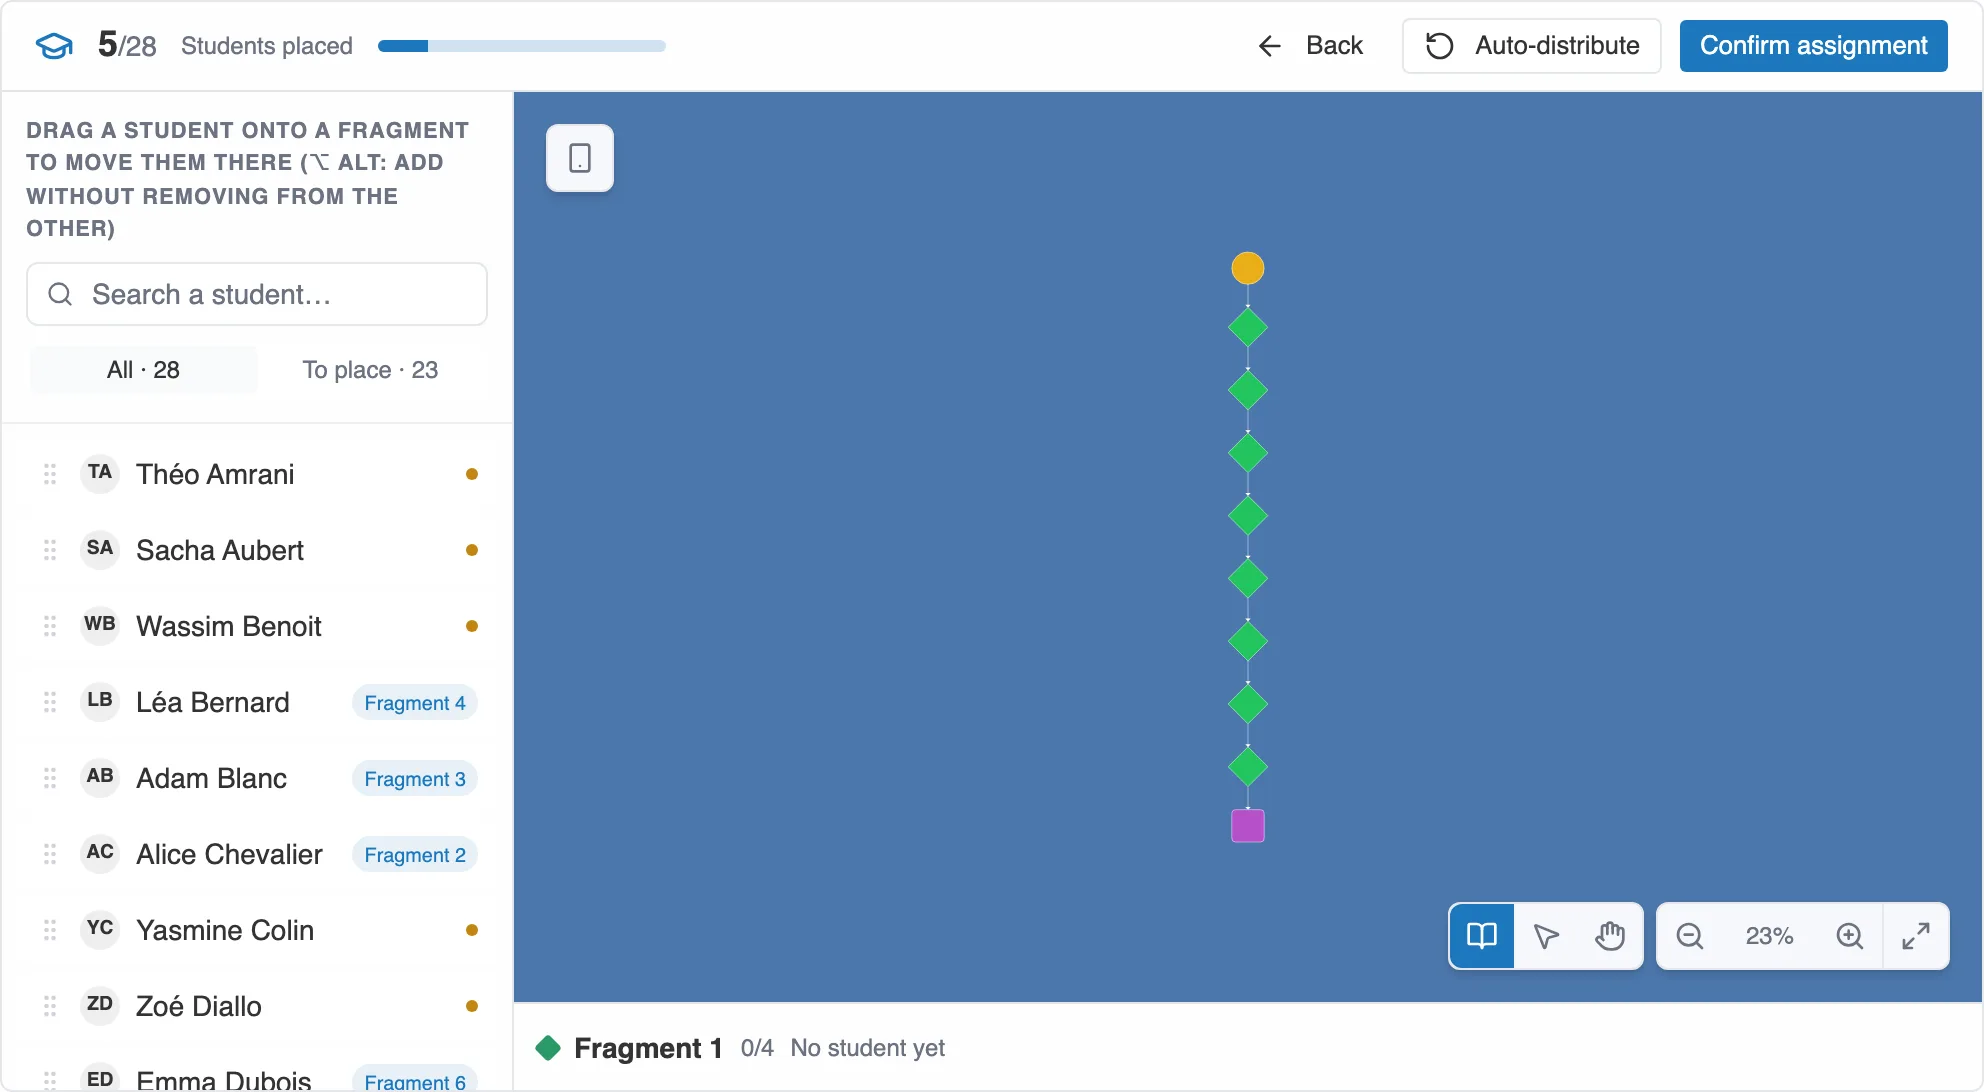
The class on the left, the master story on the right. The counter at the top says how many students have a fragment.
You place each student in two ways:
- by drag and drop, from the list onto a fragment,
- or with a click on Auto-distribute, which fills the free places and balances the groups.
Dragging a student who is already placed moves them to the new fragment. To add them to a second fragment without removing them from the first, hold Alt (⌥ on a Mac) as you drop them. If you leave the board without validating, Moiki asks you to confirm: “Leave without validating the distribution?”
Auto-distribute places students onto the fragments in one click.
A fragment takes up to four students. In each group, only one holds the keyboard at a time: that is the fragment’s editor. The first student placed becomes it, and you can name another one from the selected group.
The To place tab of the list keeps only the students who do not have a fragment yet.
Confirm, even if not everyone is placed
Section titled “Confirm, even if not everyone is placed”Confirm assignment launches the session: it switches to In progress, and each student placed finds their part in My workshops.
You do not have to place the whole class to launch. A collaborative workshop launches, then grows. That helps in several situations:
- you want to start with a few groups and open the other fragments later,
- some students are away, or have not signed in yet,
- your class has more students than your fragments have places.
A student who does not have a fragment yet sees the workshop, with a message saying that the parts have not been shared out and that theirs will appear there.
Go back to the assignment
Section titled “Go back to the assignment”Mid-session, Edit attribution reopens the board. There you can place new students, complete a group, change a fragment’s editor.
Two guarantees for the work already started:
- Auto-distribute moves nobody. It only fills the places still free.
- Removing every student from a fragment closes their access to it, without erasing anything: what they had written is kept.
3. While the students write
Section titled “3. While the students write”Each group opens its part in the editor, with your instruction and the exits to reach. What students see is described for them in Writing my story.
Track progress
Section titled “Track progress”The session page shows one row per fragment, with its group and its state. There are five of them:
- Not started: nobody has written yet.
- In progress: the group is writing.
- To review: the group clicked on “I’m done”. It is your turn.
- Needs rework: you asked the group to go over its part again.
- Integrated: the part has entered the class story.
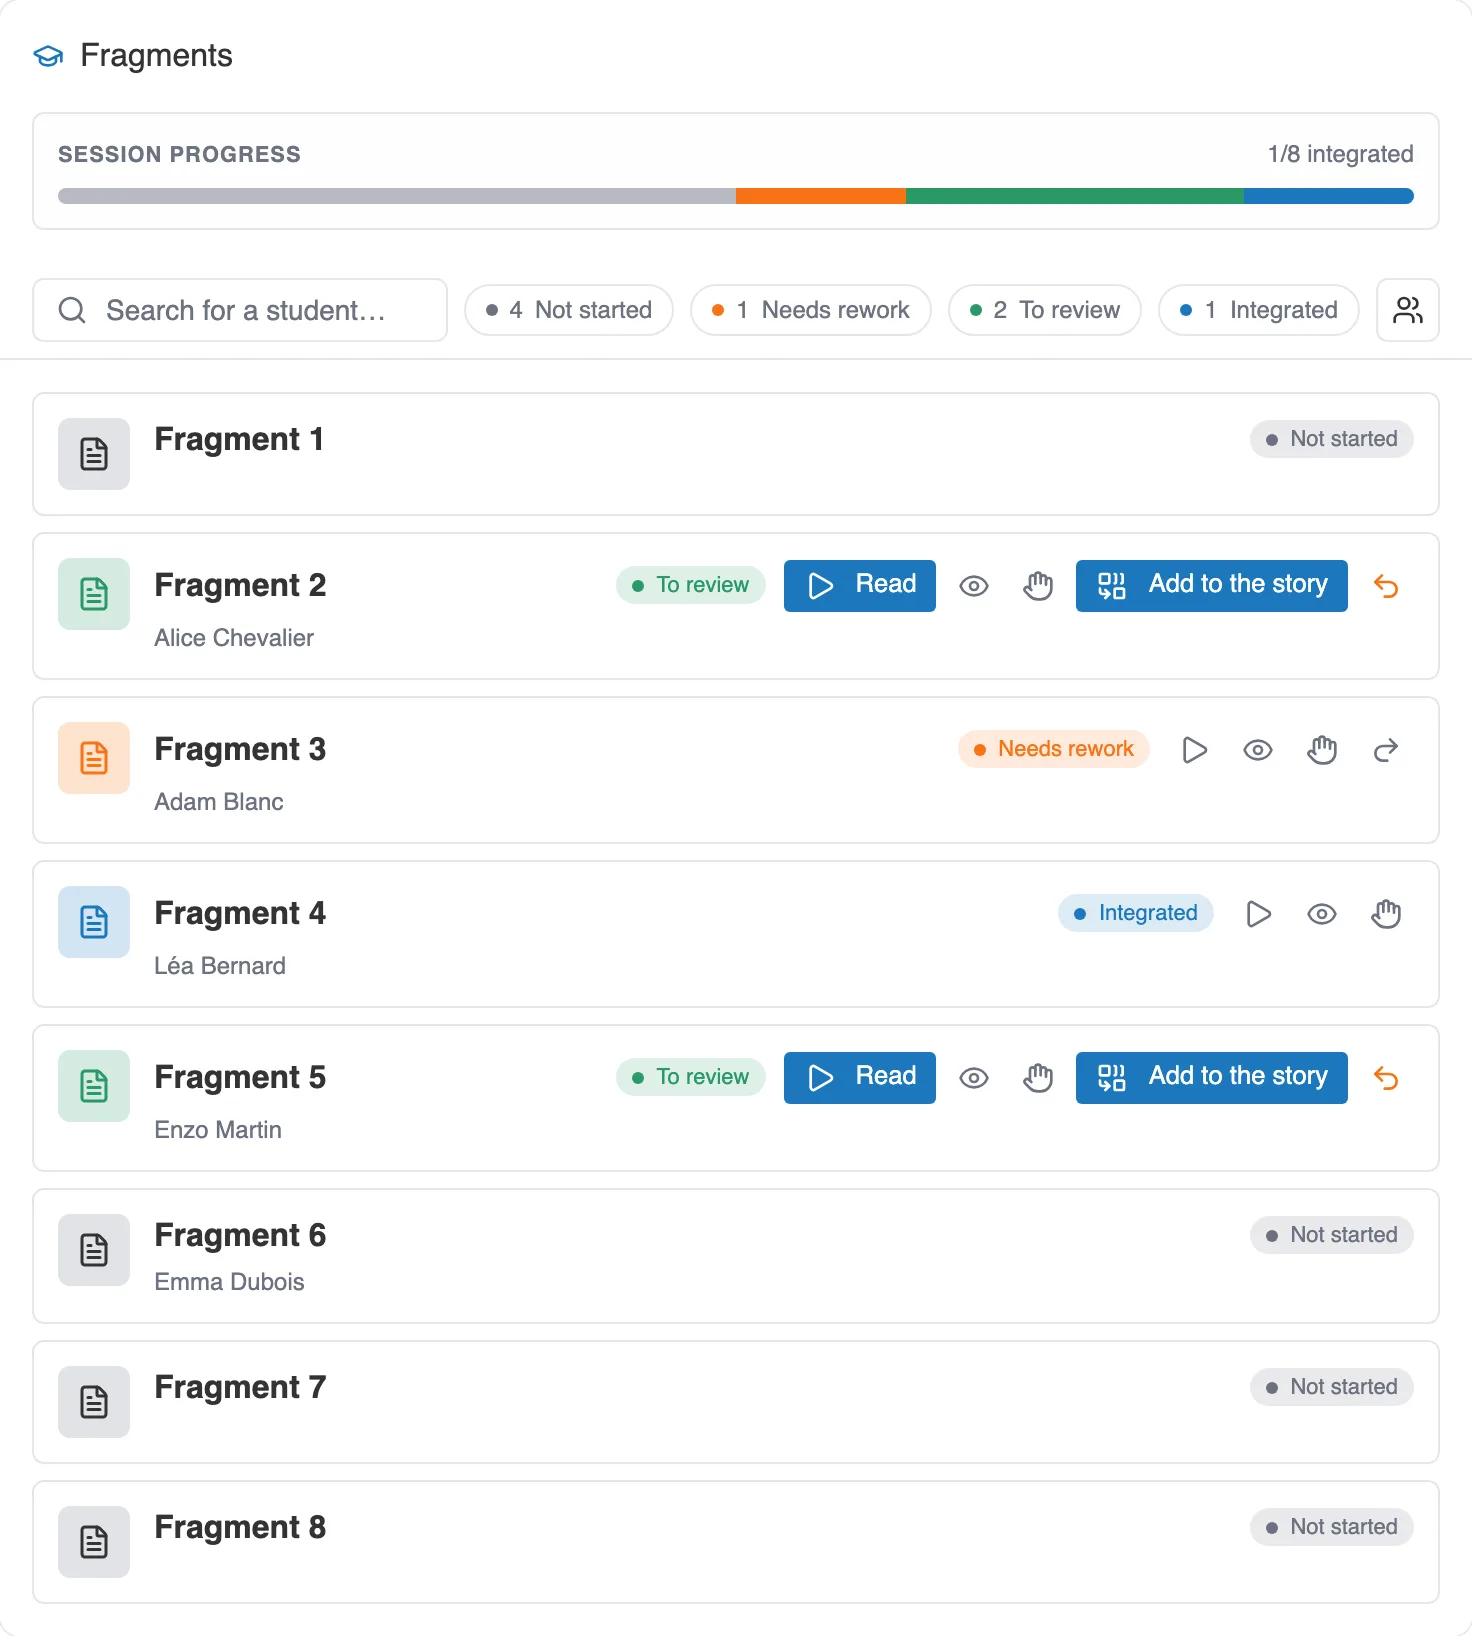
Each fragment carries its state and its group. The counters at the top filter the list in one click.
The page updates live, without reloading: a hand-in shows up as soon as a group clicks on “I’m done”.
At the top of the page, four figures sum up the session: the number of students, how many have started, how many are done, and the share of the work handed in.
Read a part, or write it in a group’s place
Section titled “Read a part, or write it in a group’s place”On each row:
- Read opens the part in the player, in a new tab, to go through it the way a reader will.
- The eye icon, View in the editor, opens the frozen story. That is where you look at how it is built and where you leave your comments.
- Take over makes you the fragment’s editor, to write it or fix it. The group can no longer touch it until you Hand back.
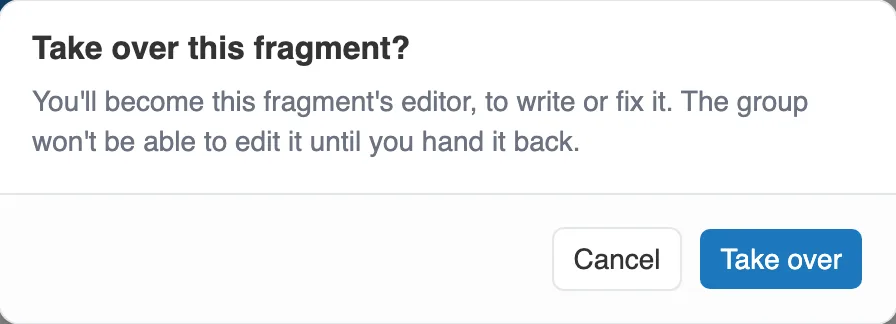
Taking over asks for confirmation, and says what it changes for the group.
To comment, see Comment on your students’ work.
4. Review and assemble
Section titled “4. Review and assemble”You choose what goes into the class story, and when.

The Assembled story block, at the top of the session.
Add to the story
Section titled “Add to the story”The Assembled story block carries the Add the part handed in button, or Add the N parts handed in when several parts are waiting. This button only takes the parts to review. The ones you asked to be reworked stay out, and the confirmation reminds you of it.
On each fragment row, an Add to the story button takes that one alone. It also appears on a part written but not handed in yet, so you do not have to wait for every group to click on “I’m done”. A confirmation then warns you: “Integrate a piece that hasn’t been handed in?” The part enters the class story as it is at that moment, the group can still edit it, and you will add it again.
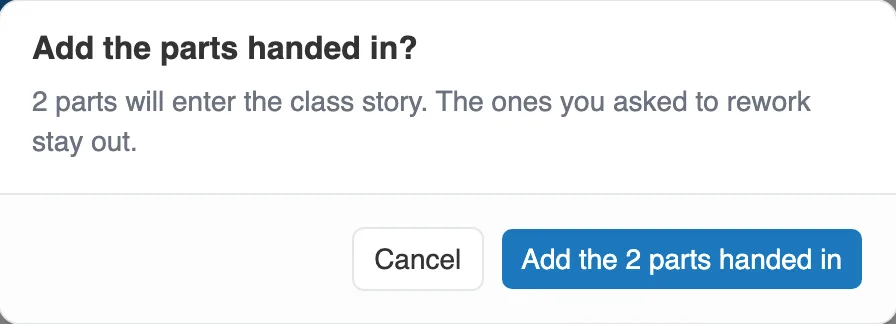
The confirmation counts the parts that will enter the story.
A part you wrote yourself, after taking over, is added the same way: you have nobody to ask to click on “I’m done”.
View the assembled story and View in the editor (read-only) only open. The assembled story is locked: it can be read, not edited. In the editor, its header says how many parts are integrated (“Integrated: 2/4”, for example), and an Integrate in the session link takes you back to the session. Looking assembles nothing, and publishes nothing. In place of a fragment not yet added, the story shows your instruction and one button per exit: it reads from start to finish at any time.
Ask a group to rework its part
Section titled “Ask a group to rework its part”A part handed in that does not do the job goes back to its authors, without breaking anything. On its row, the Request rework action opens a window where you must write what is wrong: the button stays inactive while the message is empty.
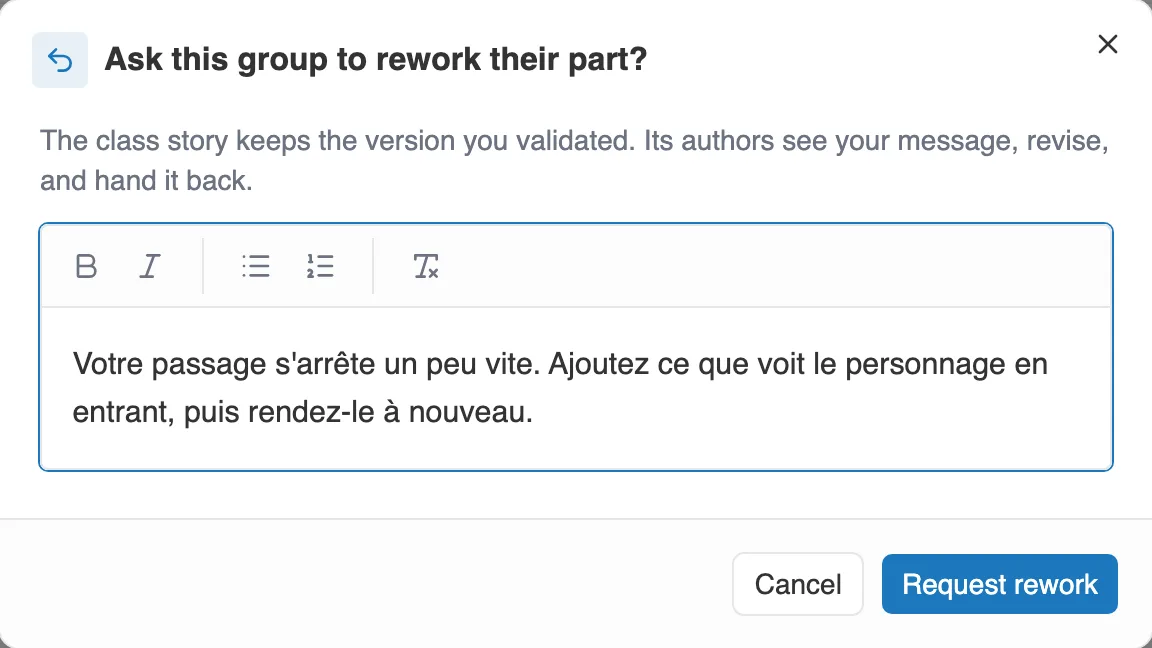
The message is required, and it is what the group will read in its comments.
That message leaves as a comment on the part, where students already read your feedback. Their card switches to Needs rework, and so does the fragment in your list. They fix it, then click on “I’m done” again.
A request sent by mistake can be undone: as long as the group has not started writing again, Cancel the rework request puts the part back To review. As soon as the group edits its part, it goes back to In progress, and the request can no longer be cancelled. The message already sent stays in its feedback.
A part already integrated cannot be sent back. To fix it, take over on it, then add it to the story again.
If you rework the master story along the way
Section titled “If you rework the master story along the way”The master story stays editable once the session is launched. Two things to know:
- A fragment’s instruction is re-read live. Rewriting it is enough, students see the new one.
- The rest (a linking text, a media, an exit) enters the assembled story at the next integration: each integration starts again from the master story as it is at that moment. The Edit the template button, in the Assembled story block, opens the master story in the editor.
As long as you have not integrated anything since the change, a banner tells you: “The template has changed since the last assembly: the class story doesn’t reflect it yet.” Its Update from the template button rebuilds the class story right away, from the master story and the parts already integrated. The same action sits in the More actions menu of the block. Integrated parts stay, the changes to the master story come in.
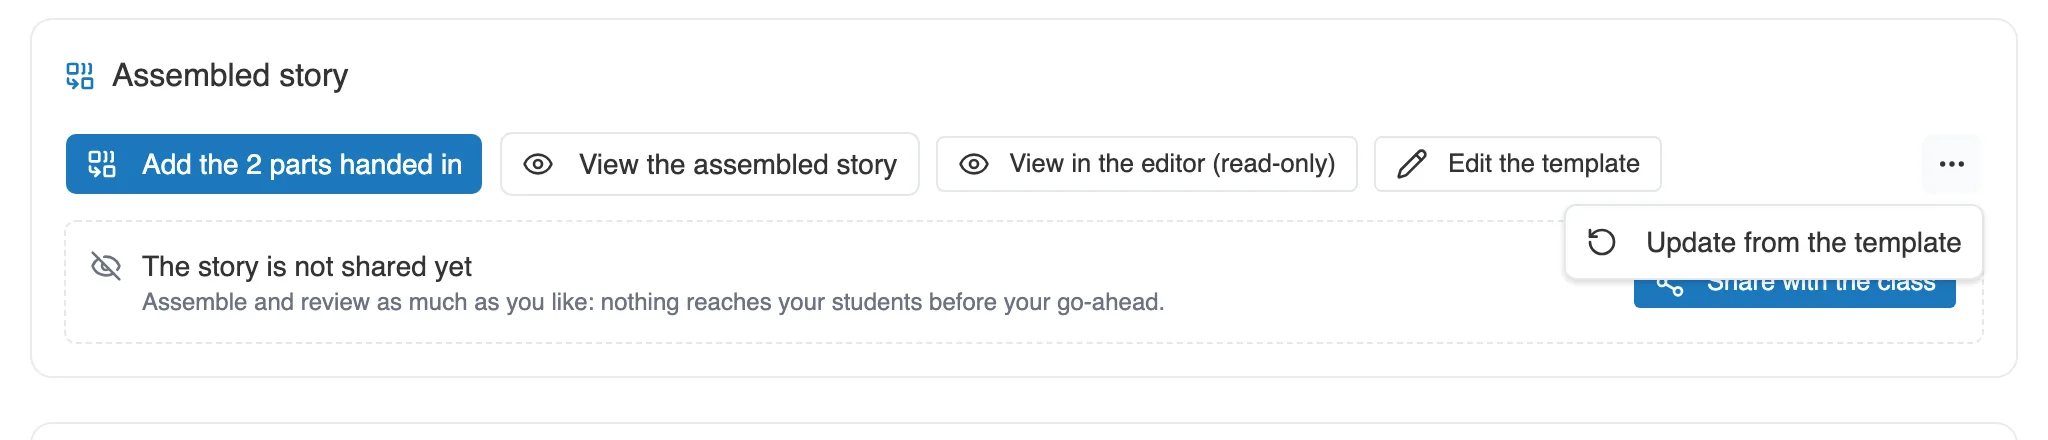
Update from the template, behind the three dots, on the right of the block.
Two things are refused while the workshop is running:
- deleting a fragment already given to students. The editor stops you before saving.
- deleting the master story, or removing it from the workshop, while a draft or in-progress session uses it. Moiki tells you: “This story is the template of a collaborative session in progress: archive the session before deleting it or removing it from the workshop.”
5. Share the story with the class
Section titled “5. Share the story with the class”Assembling shows nothing to anyone. As long as you have not given your go-ahead, a box says so: “The story is not shared yet”. On their side, your students see a card, “The full story is on its way”, and a plain count of the parts written.
The Share with the class button opens the reading to everyone. The box turns green, and Stop sharing goes back at any moment. The action is reversible, and it is not a final publication.

The story shared: your students can read it and open it in the editor.
You can share before everything is written, for a mid-way reading for instance. The story keeps growing with each part you add.
A few pointers for the lesson
Section titled “A few pointers for the lesson”These pointers come from the way the tool works, not from an imposed method.
- Play the master story before the lesson. You will see each instruction where the reader will meet it, and you will know whether the story stands up without the parts.
- Write instructions that set the scene. A group does not read the others’ text: it only has your instruction, and two lines on its card, After and Must lead to, which tell it where the reader comes from and where it must lead.
- Check sign-ins before the day. Every student must be able to sign in. See Pupils or students: how they join your space.
- Say who writes first. In each group, only one student holds the keyboard. Announcing that the pen goes round avoids arguments.
- Add parts as they come. Nothing forces you to wait for the last one. Adding early shows you the story taking shape, and leaves time for a rework.