

A writing workshop
In a writing workshop, every student writes their own interactive story, within a scope you set. You decide which tools they get, you support them while they write, then you review and comment on their work.
This guide follows the workshop in the order you will live it, from preparation to review.
The run, at a glance
Section titled “The run, at a glance”| Step | Who | What happens |
|---|---|---|
| 1. Prepare | You | You create the workshop, its instructions, and a starting story if you want one. |
| 2. Set the scope | You | You choose which editor tools are open to students. |
| 3. Launch | You | You launch the session for a class, one story each or in groups. |
| 4. Write | The students | Each one writes their story, then hands it in with “I’m done”. |
| 5. Review | You | You read the stories and you comment on them. |
1. Prepare the workshop
Section titled “1. Prepare the workshop”From Workshops, create a workshop and choose the Writing type. Give it a name: the workshop is created.
The story is optional here. In the Stories block, you can provide a starting story, an outline each student will carry on, or leave the block empty: students will then start from a blank page.
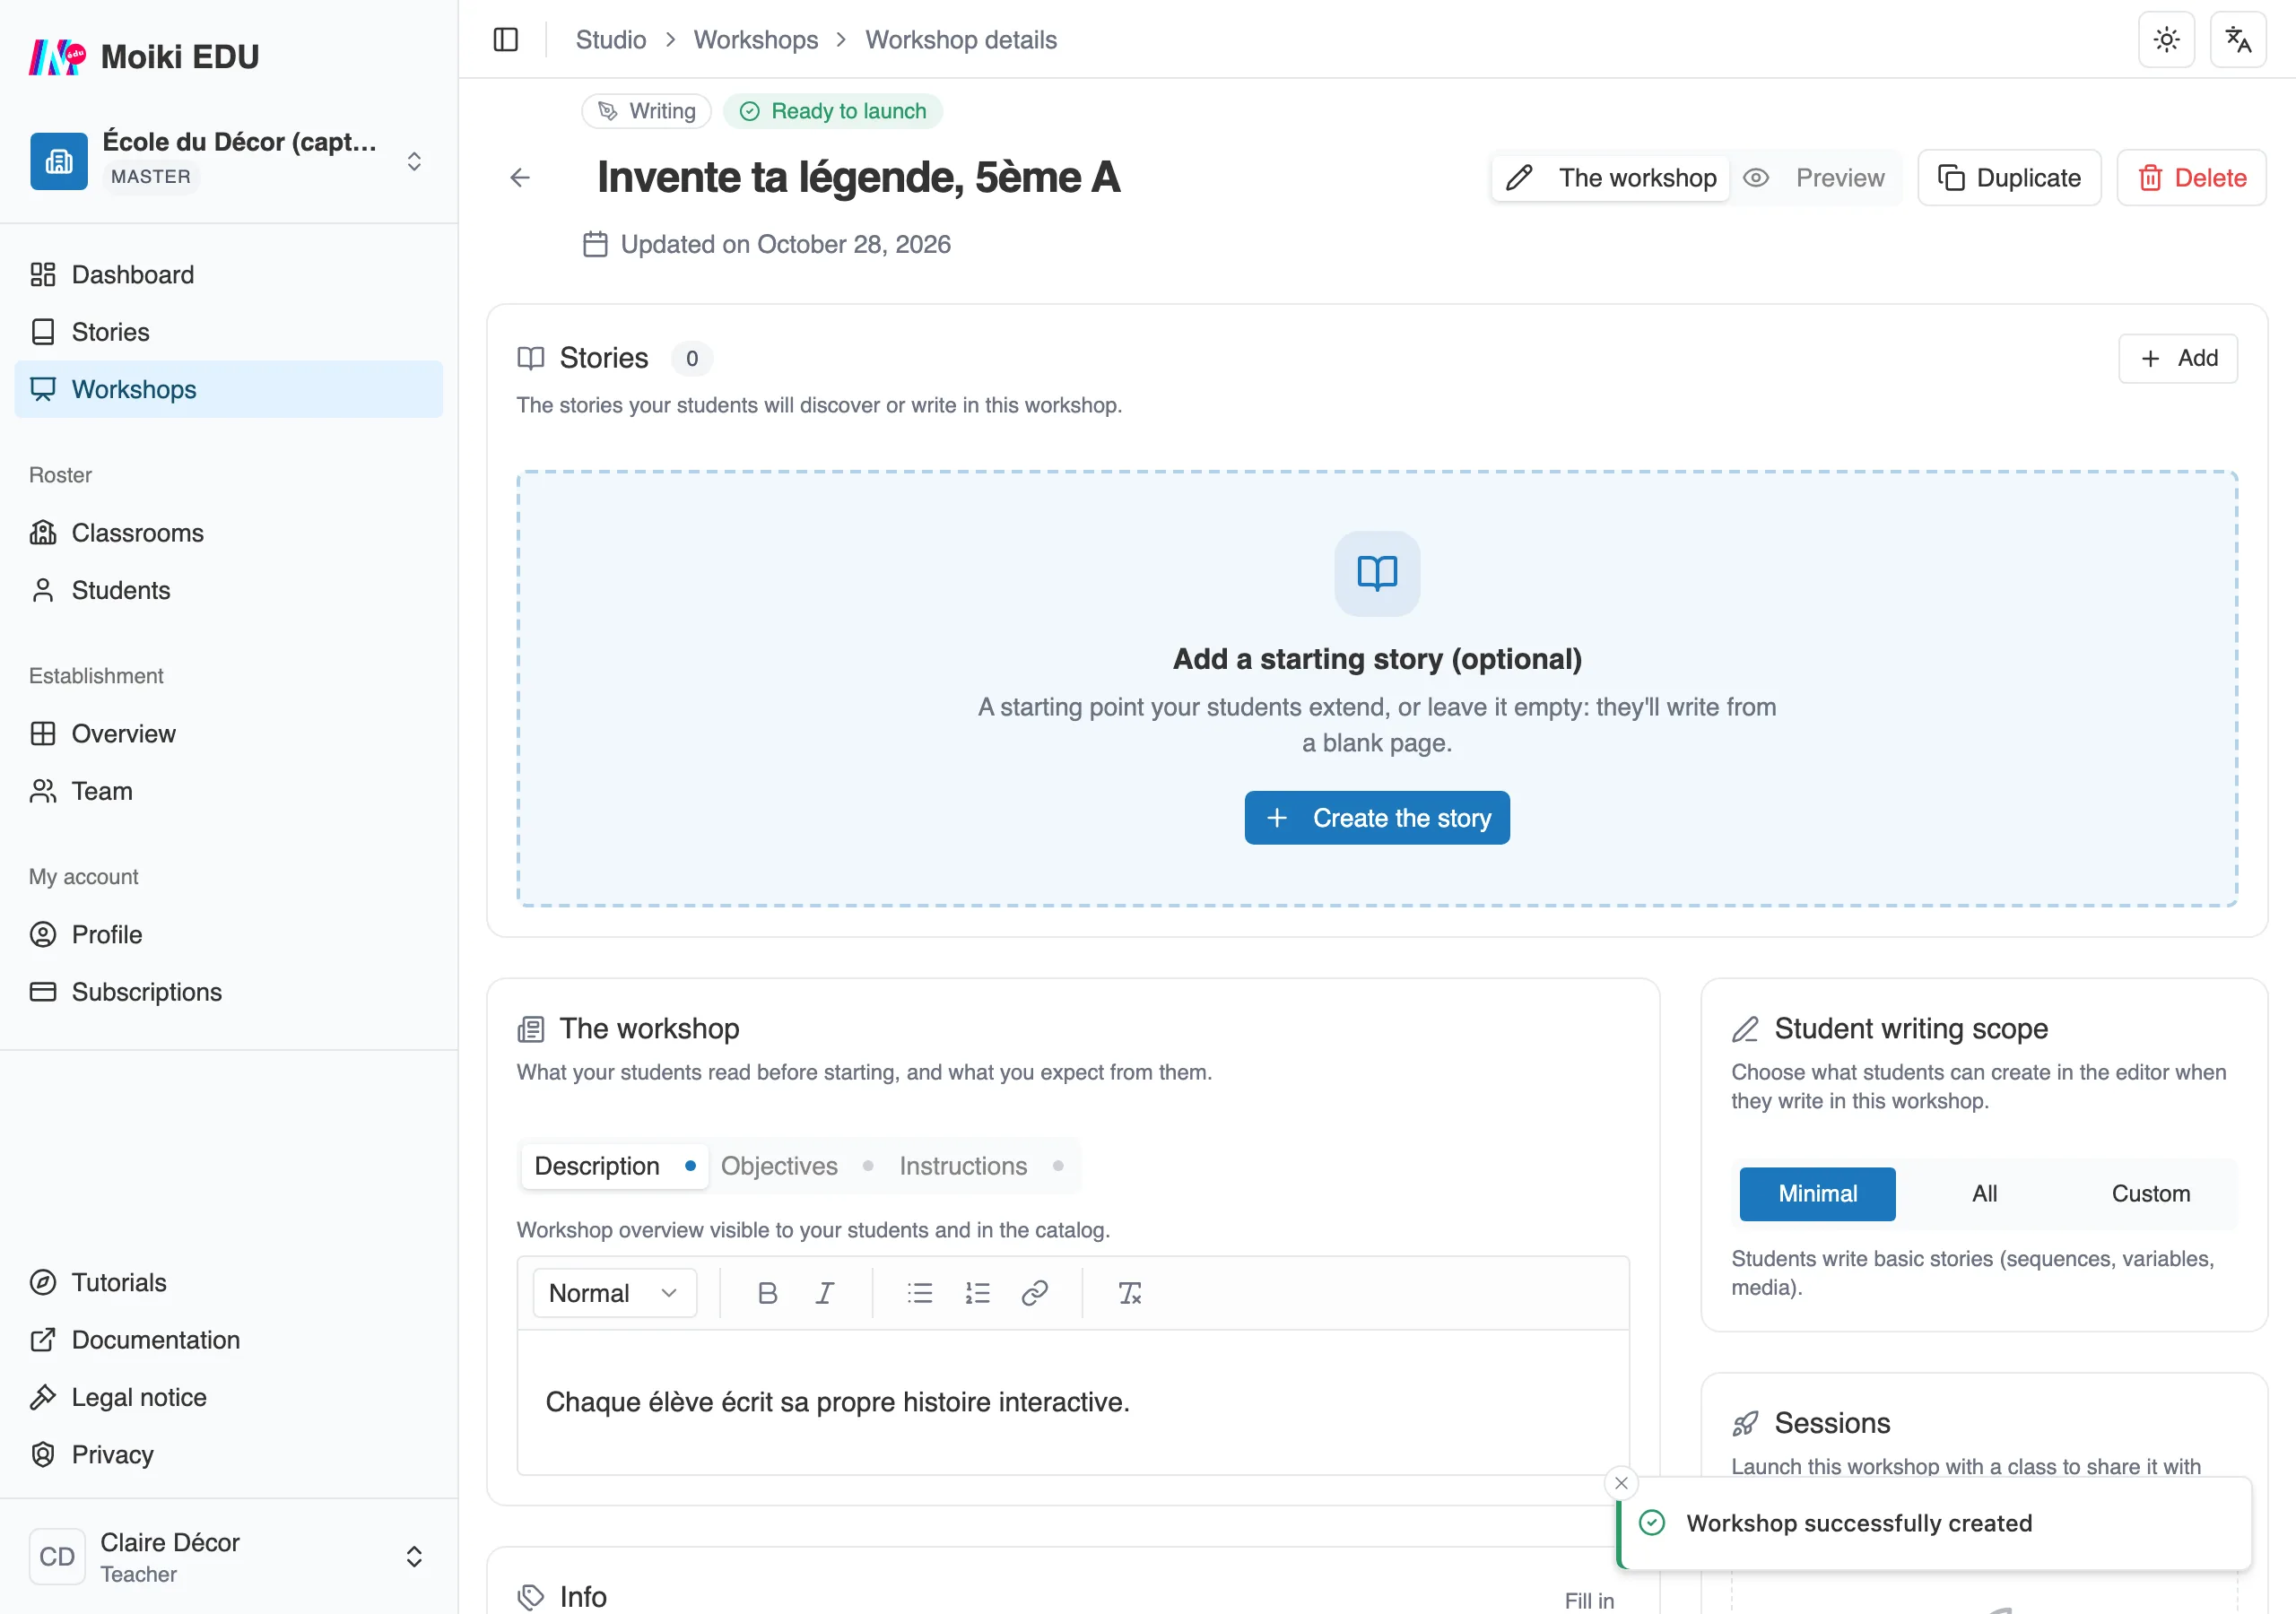
A writing workshop that has just been created. The starting story is optional, and the writing scope is already there, on the right.
Take care over the Objectives and the Instructions: students keep them at hand throughout the writing, in the Workshop panel of the editor. See Create and fill in a workshop.
2. Set the writing scope
Section titled “2. Set the writing scope”This is the key setting of a writing workshop: you decide what your students will be able to do in the editor. That is the writing scope, on the workshop page.
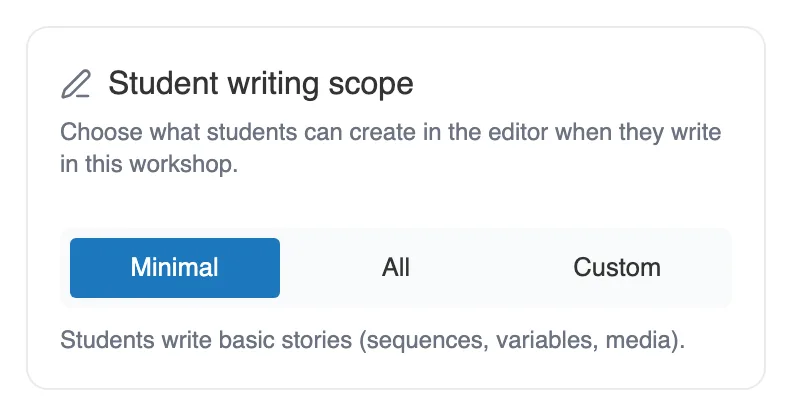
The writing scope, on the workshop page.
A selector offers three settings:
- Minimal: students write basic stories (sequences, variables, media).
- All: all available tools and sequence types are enabled.
- Custom: you choose precisely, tool by tool.
Custom mode opens two families of settings:
- Editing tools: what students are allowed to create, setting by setting (sequences, variables, media, items, events, themes, achievements, sub-graphs).
- Sequence types: which ones are available. The basic building blocks (simple, choice, final) are always there. You open the others as needed, such as Objects, Puzzle or the forms (Number form and Text form).
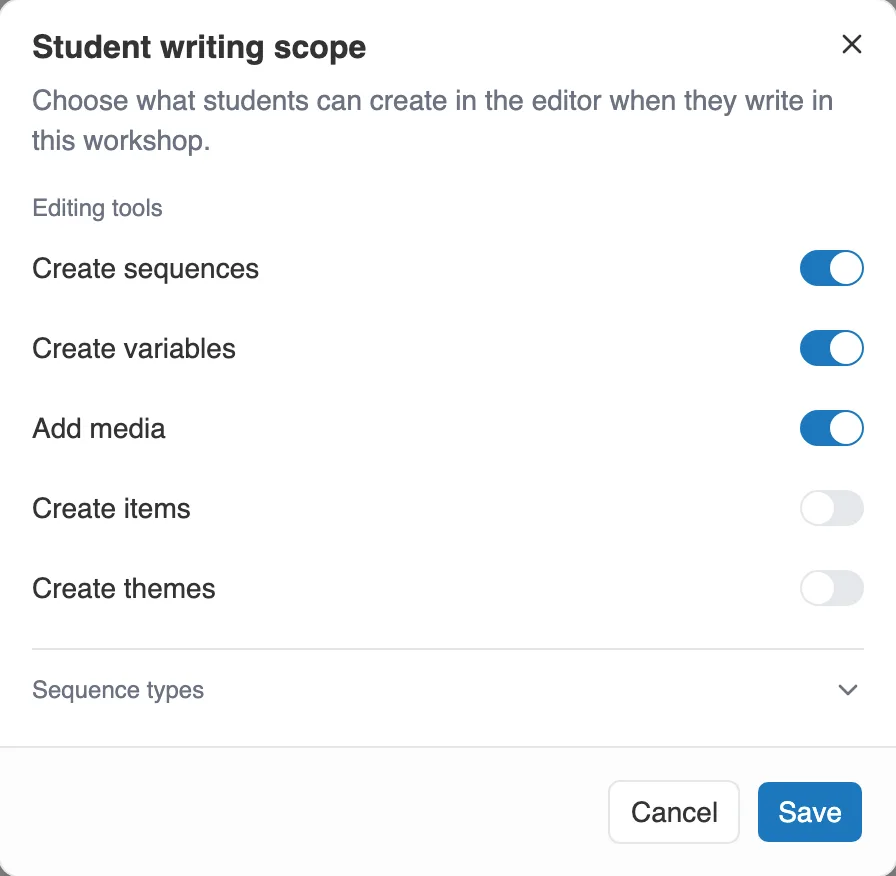
The custom setting, tool by tool.
The scope applies when a student writes in this workshop. To find out what each sequence type does, see Sequence types.
3. Launch the session
Section titled “3. Launch the session”Once the workshop is Ready to launch, Launch a session asks you for a class and, if you want them, dates. Students find the workshop in My workshops, with a button to start writing. The shared mechanics are described in Launch and track a session.
That is where, in the launch dialog, you choose How the writing is organised: One story each, or Group writing.
The scope you adjust applies on the fly, including on a session already running. The starting story is copied to each student on their first visit, so reworking it afterwards changes nothing for those who have already begun.
Form the groups
Section titled “Form the groups”A group session does not start on its own. It stays a Draft and waits for you on the Form the groups screen, which opens with a first split already made.
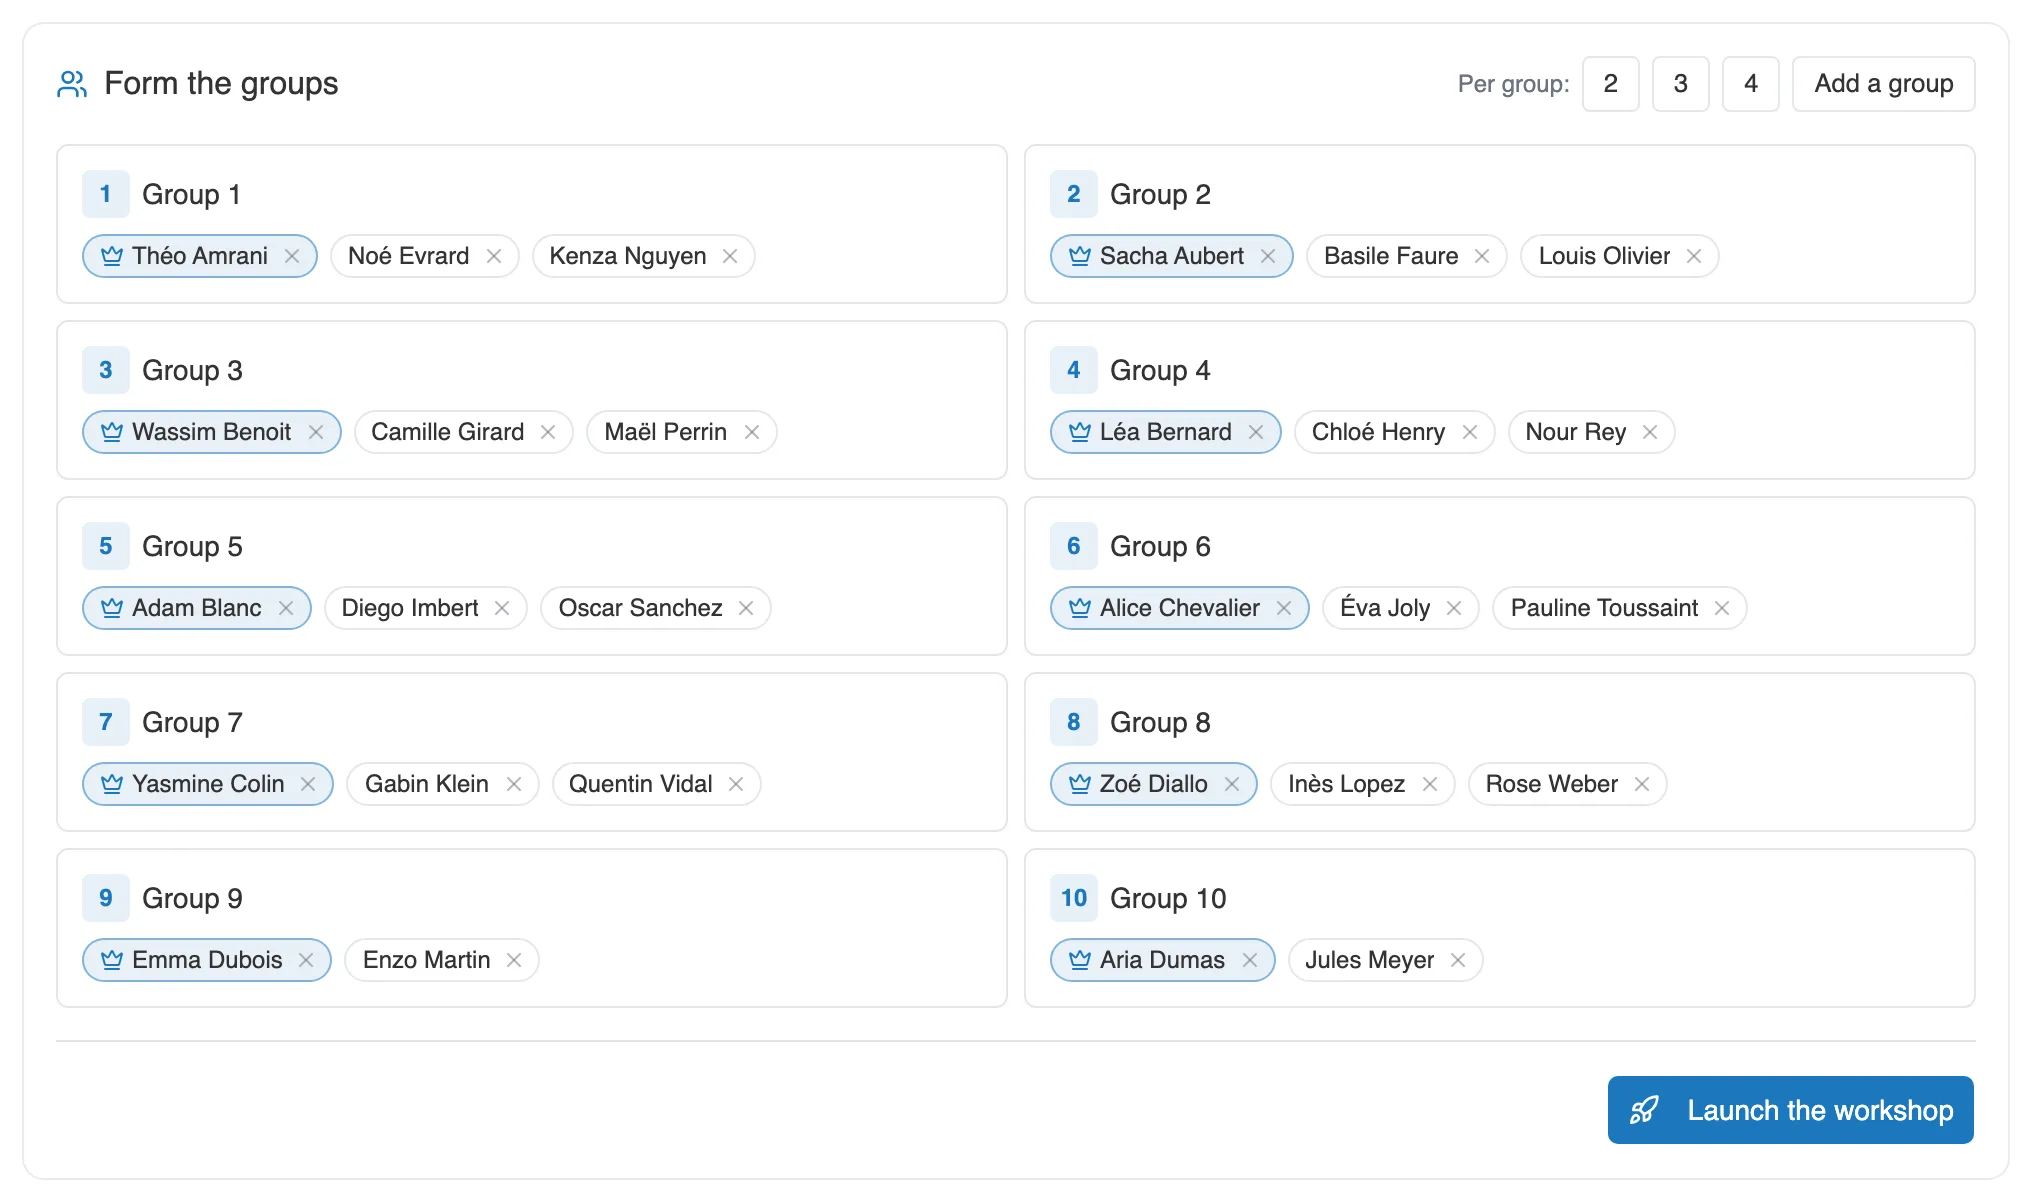
The class split into groups. The crown marks the editor, the one who holds the keyboard to begin with.
You then adjust by hand:
- The Per group setting offers 2, 3 or 4 and redoes the split in one click.
- Add a group creates one more.
- The cross next to a name removes the student from their group. A box then counts the unassigned students.
- A click on a name makes that student the group’s editor (Make editor).
The message Assign every student to launch. keeps the Launch the workshop button out of reach as long as someone is left to place. Group size is up to you.
Once the workshop is launched, the session switches to In progress, and the Groups block shows one row per group, with its members, its editor and its state: Not started, In progress or Done.
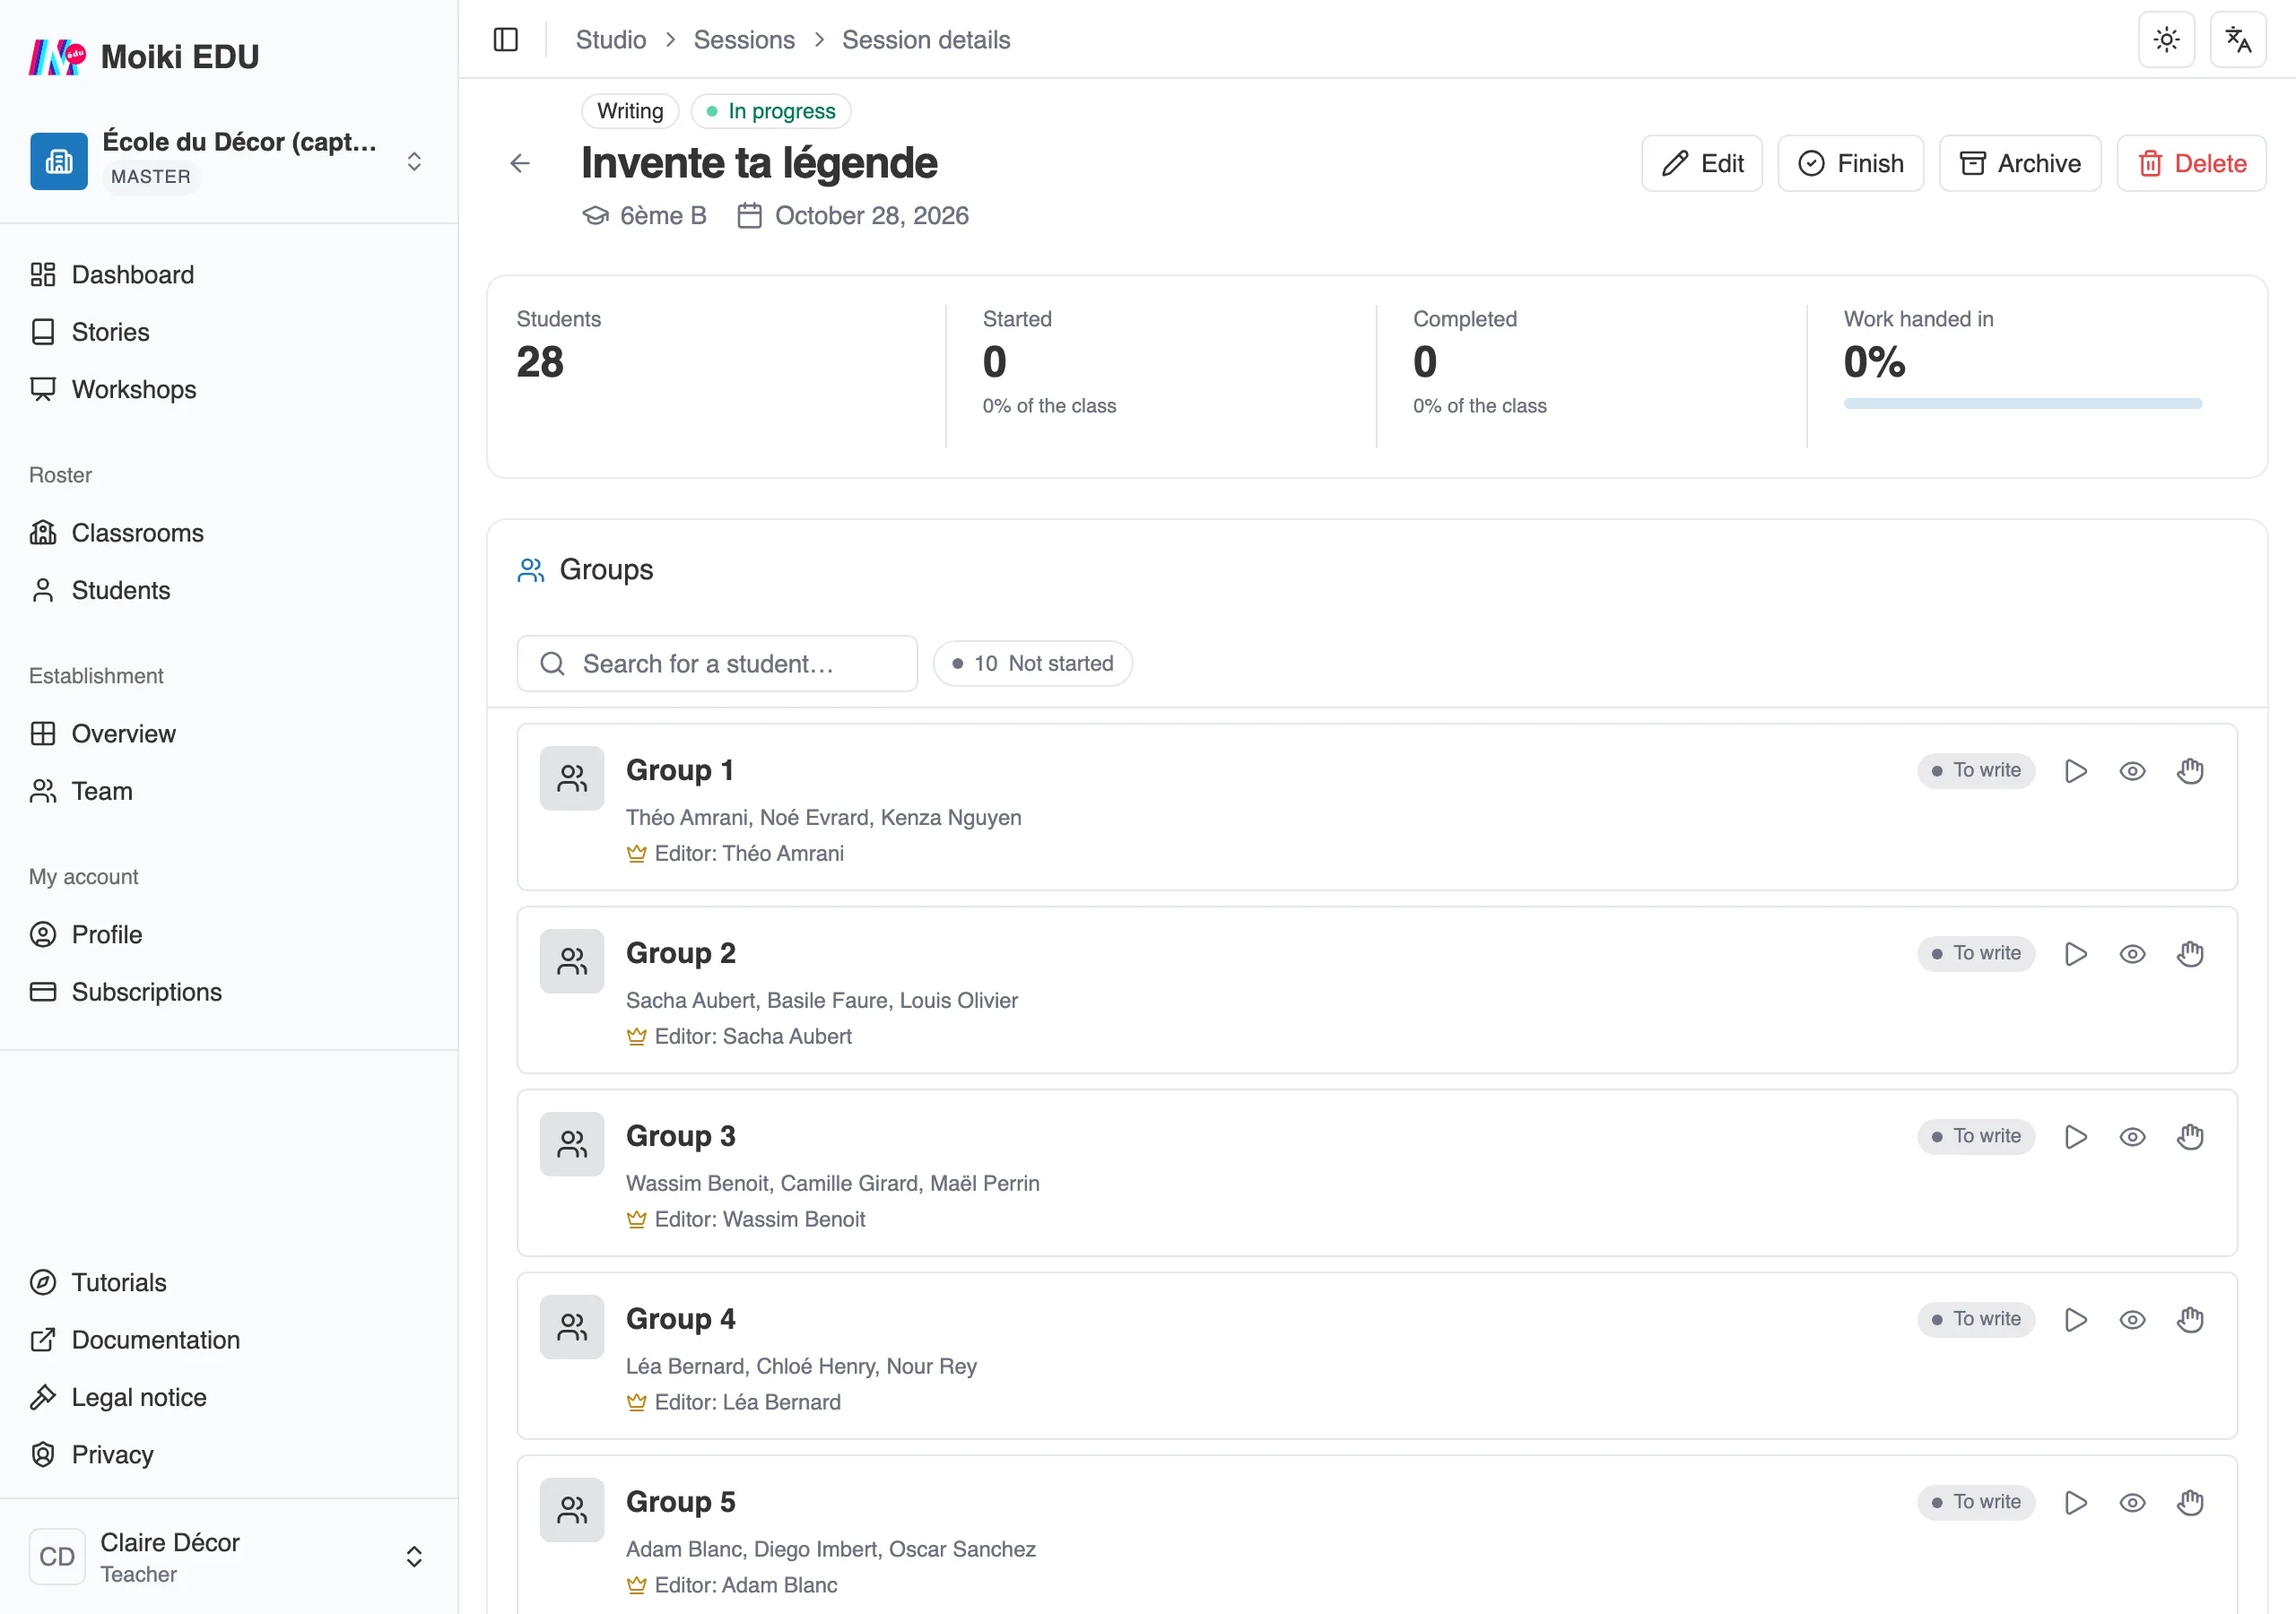
Tracking a group session: one row per group.
On each row, the same actions as in collaborative writing: Read the group’s story, View in the editor, and Take over to write it in their place, then Hand back.
4. While the students write
Section titled “4. While the students write”Each student writes in the editor, with the tools your scope leaves them. When their text is ready, they click on “I’m done”. Nothing is locked for all that: they can still go back to their story as long as the session is in progress. What students see is described in Writing my story.
On your side, the session page shows one card per student.
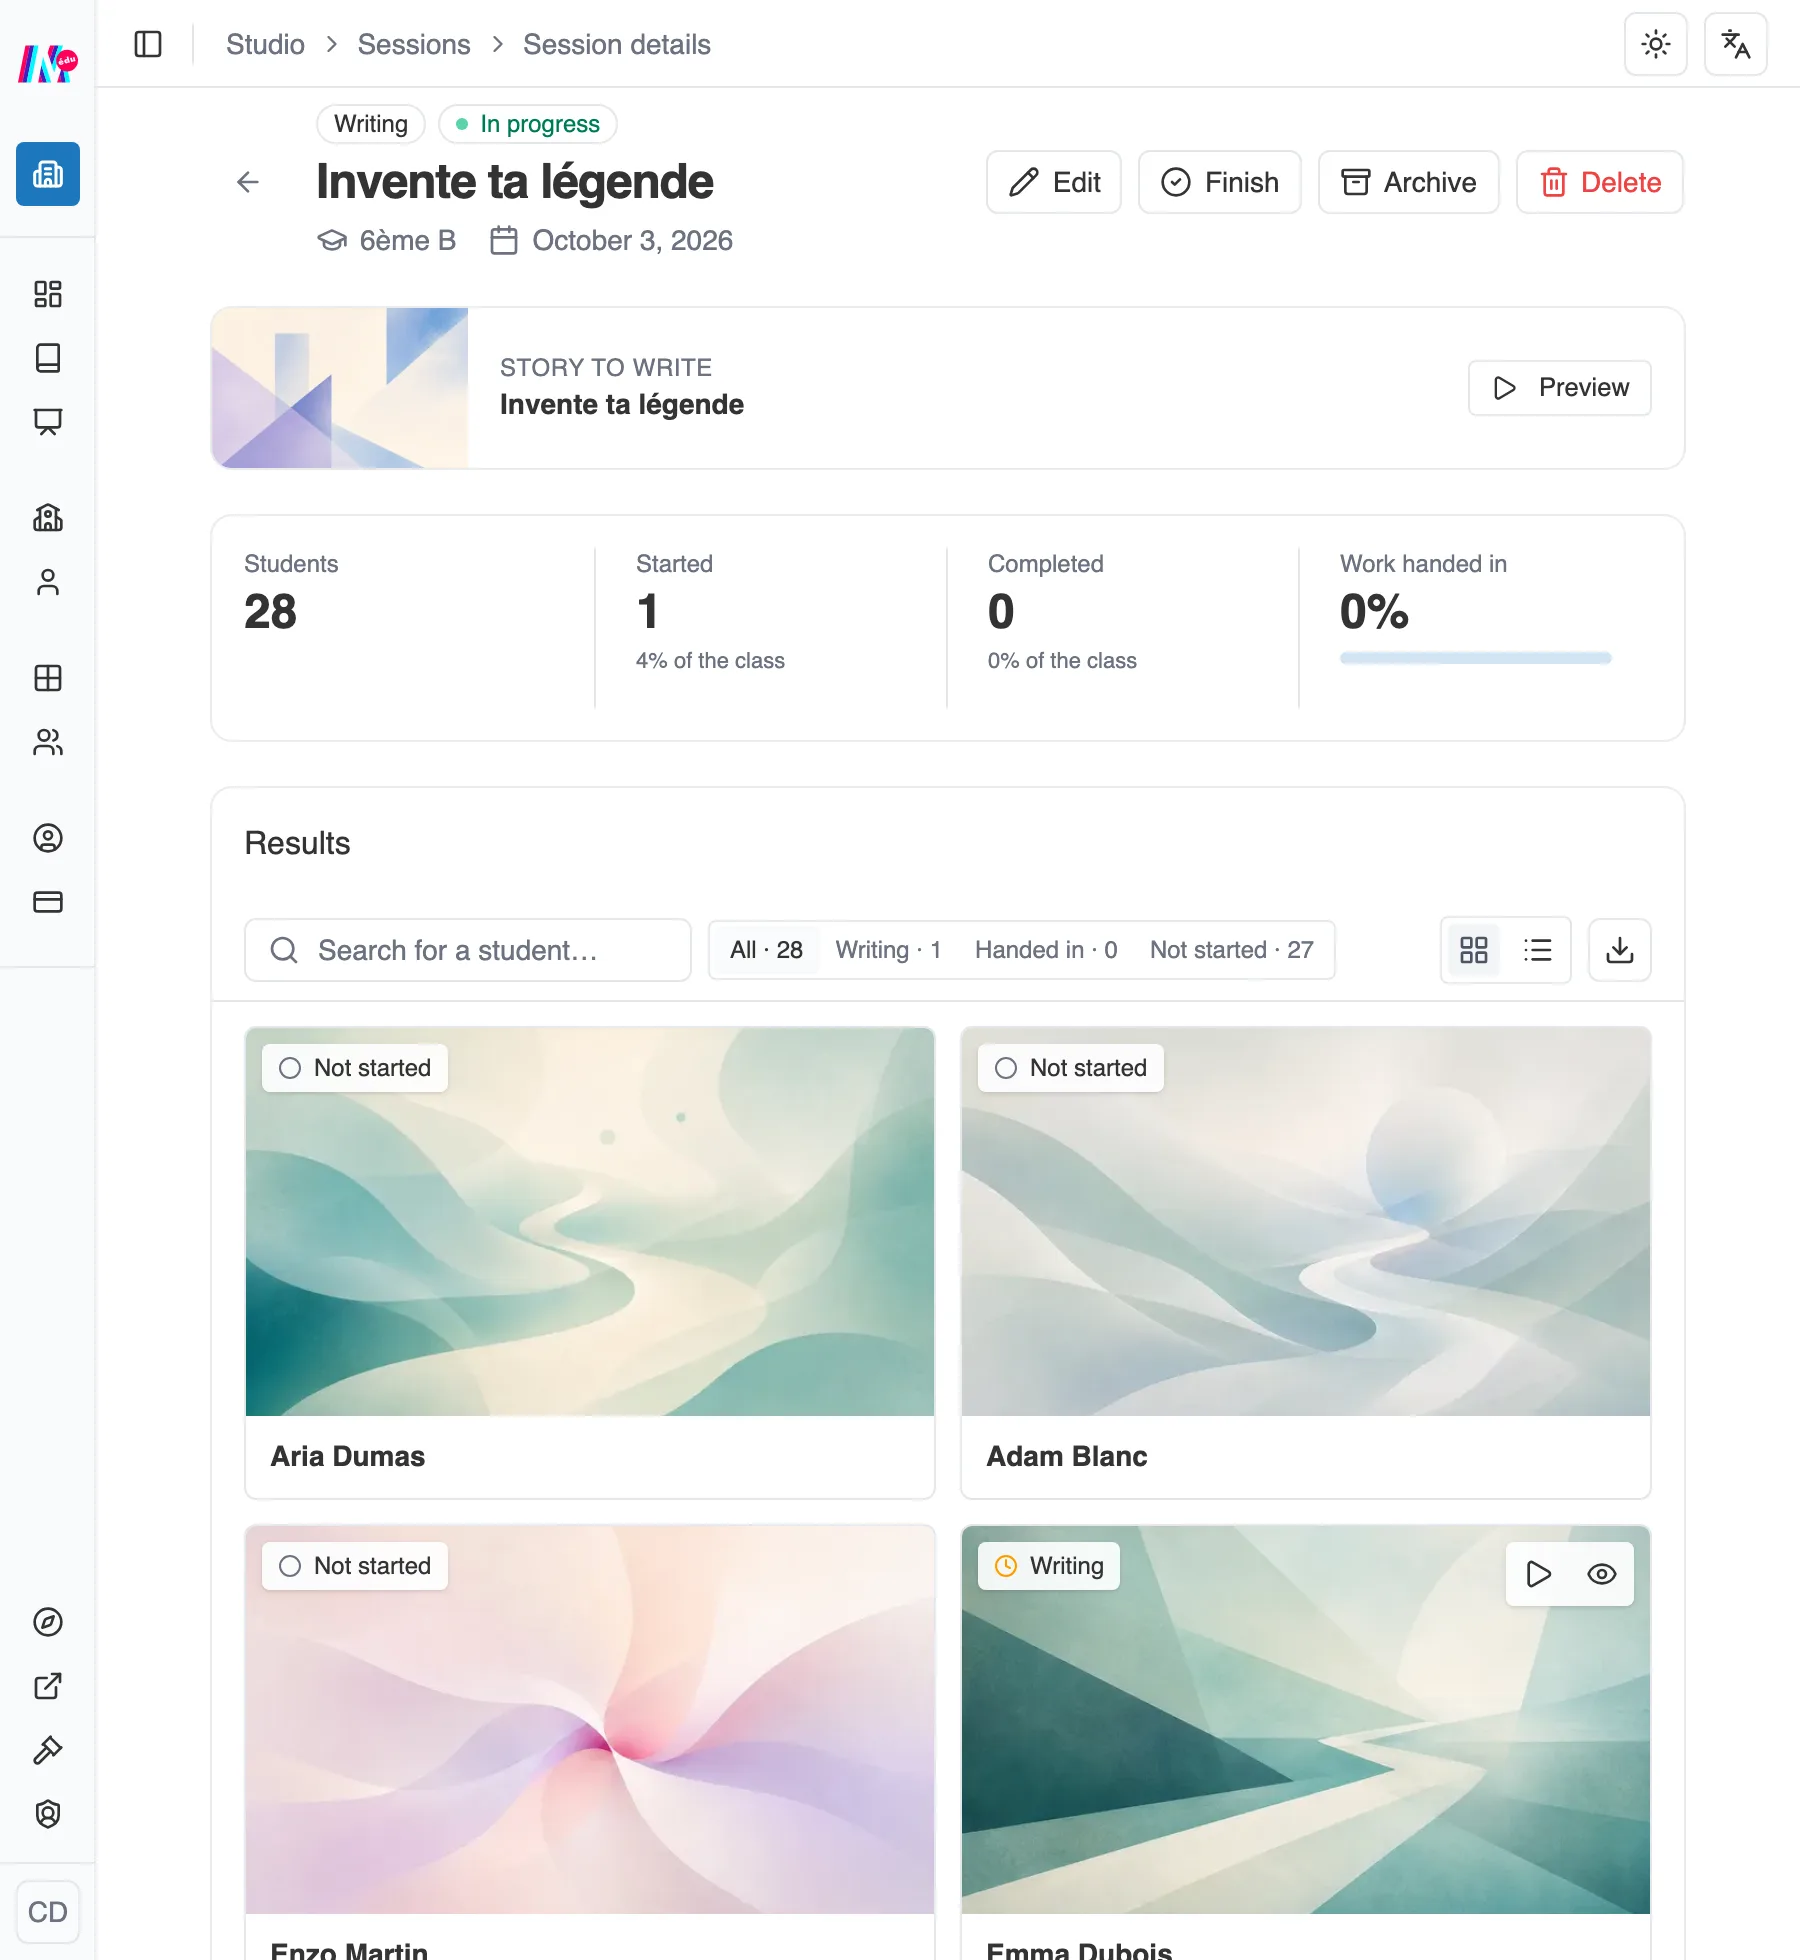
The writing session: one card per student, with the state of their story.
At the top, four figures: the size of the class, how many have started, how many are done, and the work handed in. Each card then carries the state of the story:
- Not started: the student has not begun yet.
- Writing: they are writing.
- Handed in: they clicked on “I’m done”.
The counters above the cards filter in one click, and Export (CSV) turns it into a file.
5. Review
Section titled “5. Review”As soon as a story is started, its card carries two icons, which do not serve the same purpose.
- Read opens the player in a new tab. You play the story the way a reader will, choice after choice.
- The eye icon, View in the editor, opens the story frozen in the editor. That is where you see how it is built, and that is where the comments live.
The gesture is the same whatever the workshop, one story each, in groups or in collaborative fragments.
Comment on your students’ work
Section titled “Comment on your students’ work”You can comment on your students’ stories, directly in the editor.
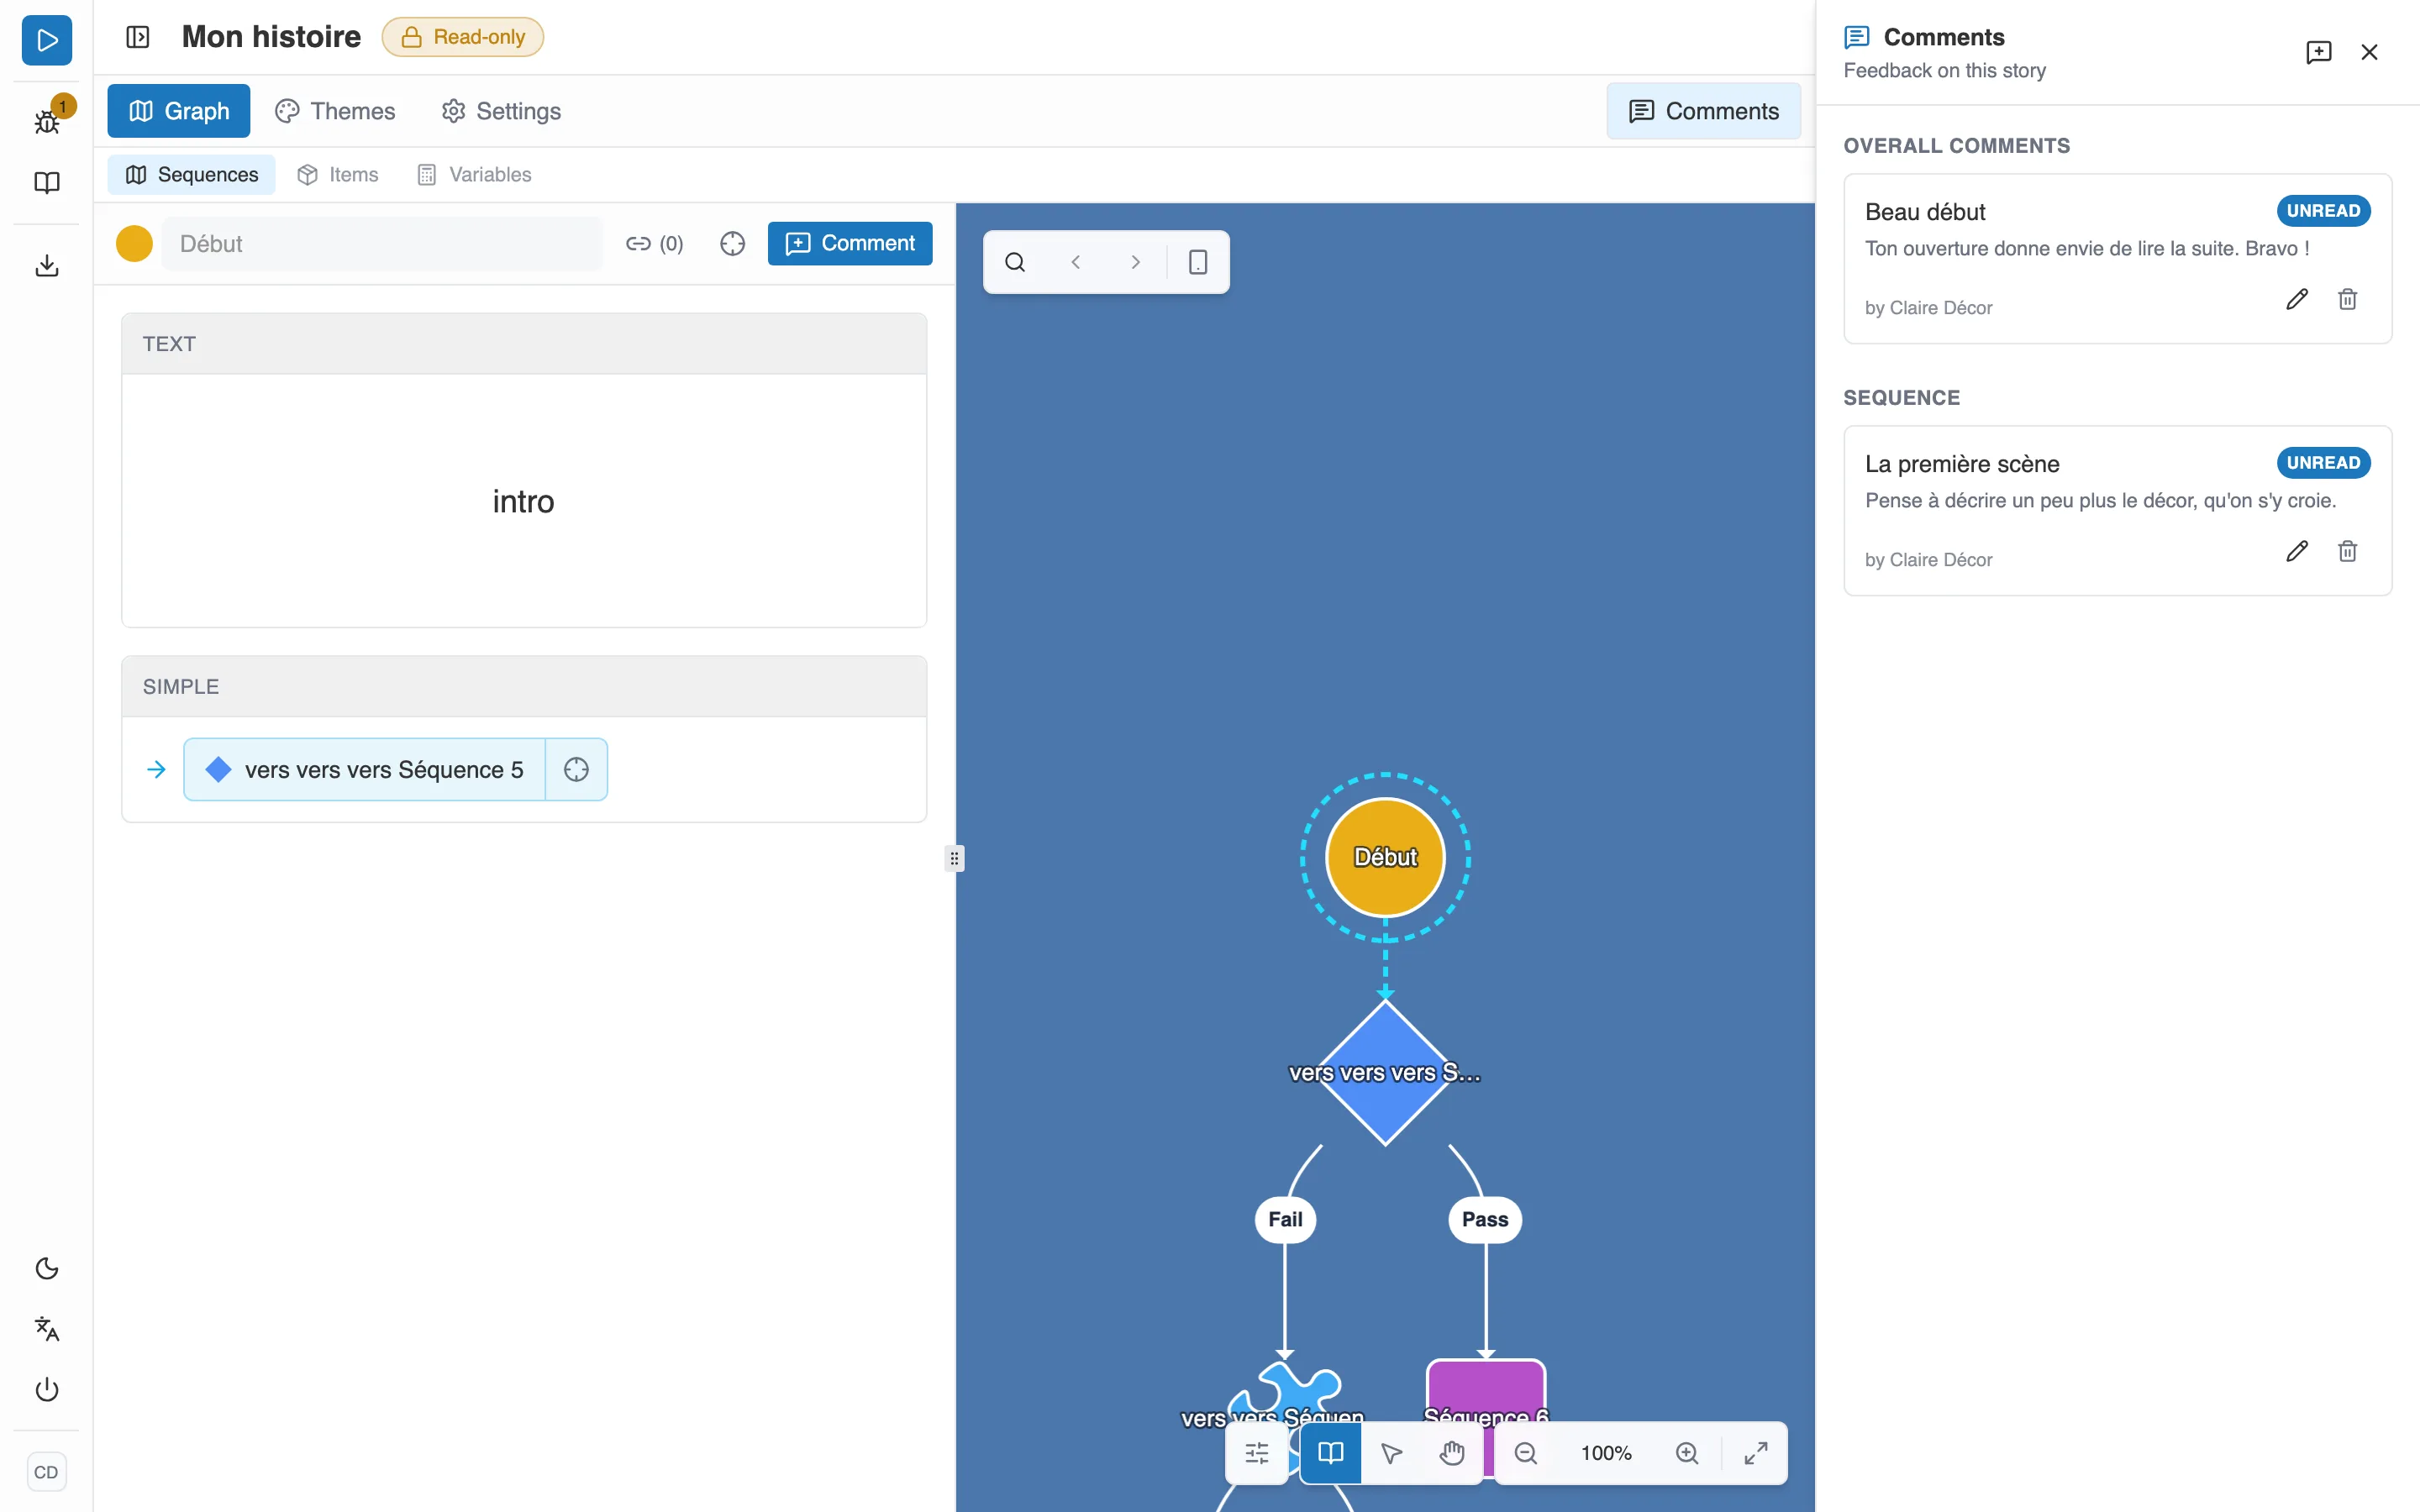
The comments panel, open on a student’s story.
A Comments panel opens on the side when you look at or review a student’s work. You can leave an Overall comment on the story, or attach one to a specific sequence. Every comment carries a Title and a Message.
Students see your comments but do not create any of their own: the thread stays yours, like an annotated paper.
A few pointers for the lesson
Section titled “A few pointers for the lesson”These pointers come from the way the tool works, not from an imposed method.
- Start with a narrow scope. The Minimal setting is enough for a first story, and you can widen it mid-session: the scope applies on the fly.
- Decide on the starting story before launching. It is copied to each student on their first access. Reworking it afterwards changes nothing for those who have already begun.
- Write instructions that bear rereading. Students find them at any time in the Workshop panel, next to the “I’m done” button.
- Check sign-ins before the day. See Pupils or students: how they join your space.
- Comment during the writing, not only at the end. A comment set on a sequence takes the student straight to the place concerned.
- Finish when it is really over. As long as the session is in progress, students can go back to their text, even once handed in. Finish closes writing and leaves them read access, Archive takes everything away. See Launch and track a session.